
Almost every article on this website ends up at the same advice: add good compost. When you are fighting early blight on tomatoes, feeding hungry onions, or rescuing tired soil, compost is the foundation. Yet many farmers I meet still buy bags of fertilizer because they believe compost is slow, smelly or complicated.
It is none of those things when it is done right. In this guide I will show you exactly how to make compost (commonly known as mboji in Swahili or mbolea vunde) at home or on the farm, using materials you already throw away. You will learn the two methods that work best in East African conditions, the simple mix of “greens” and “browns”, how to tell if your heap is working, and what to do when it is not.
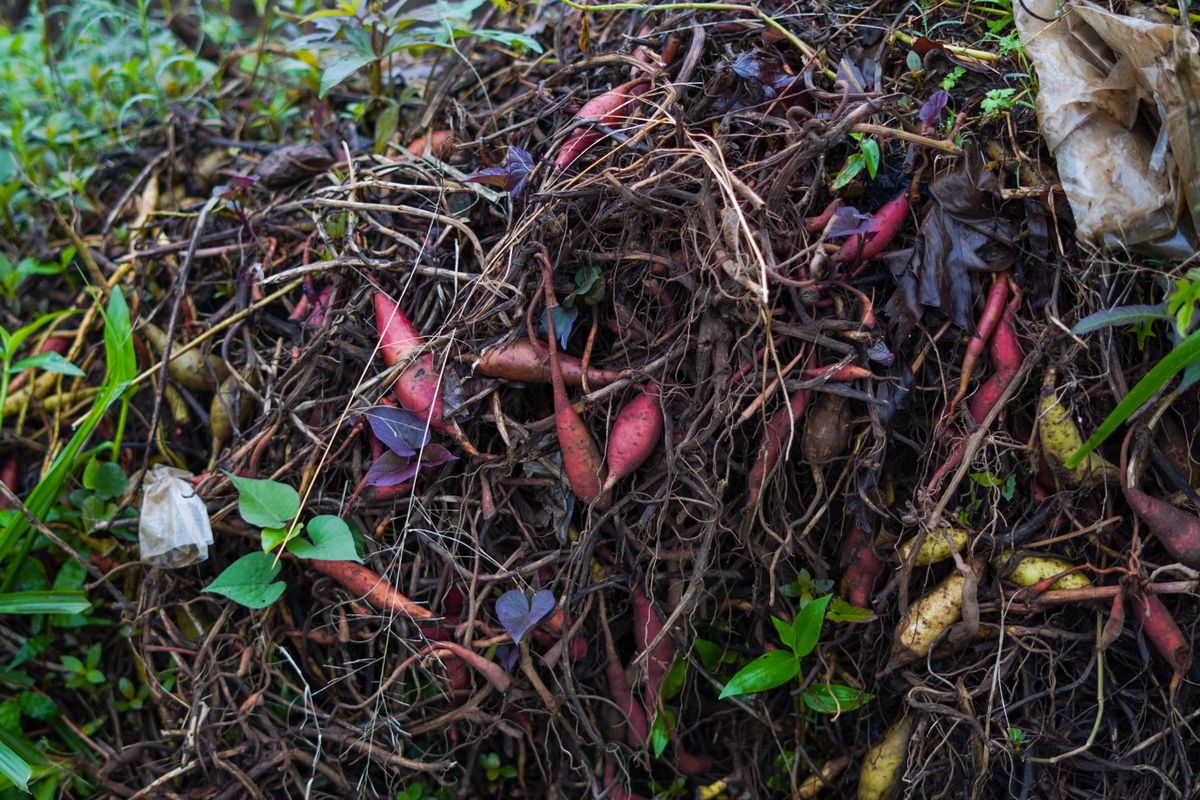
What is compost and why does your soil need it?
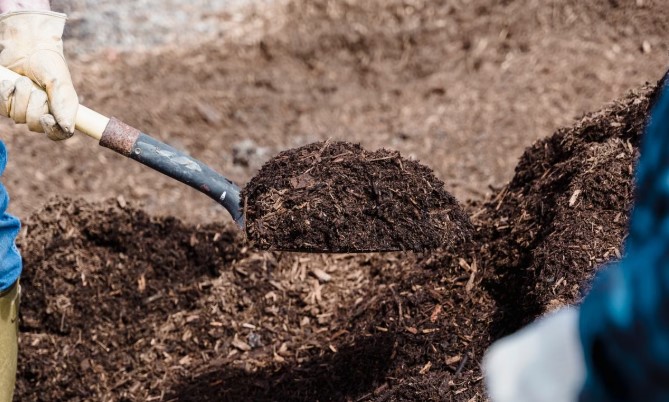
Compost is plant and animal material that has been broken down by bacteria, fungi and small creatures into a dark, crumbly, earthy-smelling material. It is the closest thing we have to the rich forest soil that grows healthy plants without anyone feeding them.
Compost does much more than supply nutrients:
- It holds water. According to Infonet-Biovision, adding compost raises the water-holding capacity of sandy soils and improves the structure and drainage of every soil type.
- It feeds soil life. Healthy soil microbes compete with and suppress many disease-causing organisms. That is why compost is the first line of defence against problems like Fusarium wilt.
- It releases nutrients slowly. Unlike synthetic fertilizer that washes away with the first heavy rain, compost feeds your crops steadily through the season, including trace elements such as zinc.
- It costs nothing. Crop residues, kitchen peelings, manure and weeds become free fertilizer instead of waste.
If you are not sure whether your garden needs it, read 6 signs your garden soil needs organic matter. In my experience, almost every soil does.
How composting works (the simple science)
A compost heap is a city of microorganisms. When you give them food, water and air, they multiply quickly and their activity produces heat. Researchers at Cornell University describe three phases:
- Warm-up phase (a few days): ordinary microbes start eating the easiest material, and the heap warms up.
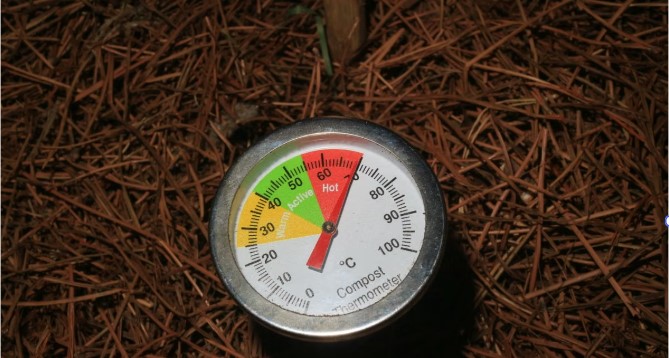
- Hot phase (days to weeks): once the inside passes about 40°C, heat-loving (thermophilic) bacteria take over. This is when material breaks down fastest and weed seeds and disease organisms are killed.
- Cooling and curing phase (several weeks): the heap cools, fungi, earthworms and other creatures move in, and the material matures into finished compost.
Your job as a composter is simply to keep the microbes happy. They need four things: the right food mix, enough moisture, enough air, and a heap big enough to hold its heat.
Greens and browns: getting the mix right
Every compost ingredient falls into one of two groups:
- Greens are rich in nitrogen. They are usually fresh and moist and they make the heap heat up.
- Browns are rich in carbon. They are usually dry and woody and they give the heap structure and air pockets.
Scientists measure the balance as the carbon-to-nitrogen (C:N) ratio. The University of California Cooperative Extension recommends a mix of about 30 parts carbon to 1 part nitrogen by weight. You do not need a laboratory to achieve this. As a practical rule, use about two buckets of browns for every one bucket of greens, then adjust by watching the heap (see the troubleshooting table below).
| Greens (nitrogen-rich) | Browns (carbon-rich) |
|---|---|
| Fresh cow, goat, rabbit or chicken manure | Dry maize stalks and husks (chopped) |
| Kitchen peelings, vegetable and fruit scraps | Dry grass, hay and straw |
| Fresh green weeds (before they set seed) | Dry leaves |
| Tithonia (Mexican sunflower), calliandra, leucaena and sesbania leaves | Bean and sunflower stalks, rice husks |
| Comfrey leaves | Sawdust from untreated wood (in small amounts) |
| Coffee grounds, tea leaves | Shredded cardboard and plain paper |
| Fresh grass clippings | Small twigs and hedge cuttings (for the bottom layer) |

Comfrey deserves a special mention: its leaves break down quickly and are full of potassium, so they act as a natural compost activator. I explain how to grow and use it in how to use comfrey to make organic fertilizer.
Useful extras in small amounts
- Old compost or good topsoil: a few handfuls per layer bring in the microbes that start the process.
- Wood ash: adds potassium, phosphorus, calcium and magnesium and neutralises acids from the manure, but sprinkle it lightly, because too much makes the heap alkaline.
- Crushed eggshells: a slow source of calcium, the nutrient behind blossom end rot problems.
- Diluted animal urine: a strong nitrogen booster if your heap is slow to heat.
What NOT to put in your compost
- Diseased plants. Leaves and stems infected with late blight, tomato mosaic virus, Verticillium wilt or club root can survive in a heap that does not get hot enough. Burn them or bury them deep, away from the garden.
- Pest-infested crop residues. Tomato leaves full of Tuta absoluta larvae should be destroyed, not composted.
- Weeds carrying seeds or spreading roots such as couch grass, unless you are sure your heap will get hot.
- Dog, cat or human waste: these can carry dangerous pathogens.
- Plastic, glass, metal and treated or painted wood.
- Plants recently sprayed with herbicides.
Choosing your method: heap or pit?
In East Africa, two methods do most of the work. The steps for building them are the same; the difference is whether you build above the ground or in it.
| Heap method | Pit method | |
|---|---|---|
| Best for | Wetter areas and the rainy season | Dry areas and the long dry season |
| Why | Excess water drains away so the heap does not become waterlogged | The soil walls keep moisture in, so you need to carry less water |
| Drawback | Dries out quickly in hot, windy weather | Can flood and go sour in heavy rain; turning is harder work |
This advice matches guidance from both The Organic Farmer magazine and Infonet-Biovision. Before you start, choose your spot with the same care you use for a garden; my guide on choosing a suitable garden site covers drainage and access.
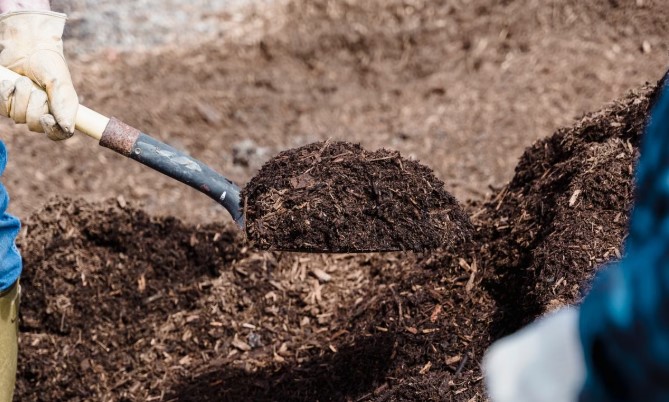
How to make compost: step by step
Step 1: Pick the right place
Choose a shaded, sheltered spot close to your garden and near a water source, so carrying materials and water is easy. Shade stops the heap from drying out in the sun. Build on bare soil, never on concrete, so earthworms and microbes can move in from below. Keep it a reasonable distance from the house.
Step 2: Collect enough material first
Gather all your greens and browns before you start building, so you can make the whole heap in one day. A heap needs to be big to hold heat: aim for about 1 to 1.2 metres wide, at least 1.5 metres long and up to 1.5 metres high. Do not go wider than 1.2 metres, or you will not be able to reach the middle without stepping on it. Smaller heaps lose heat too quickly and break down slowly. If your household cannot fill a heap that size, join with a neighbour.
Chop coarse material such as maize stalks into pieces about the length of your hand. Smaller pieces break down much faster.
Step 3: Prepare the base
- Heap method: dig a shallow pit about 30 cm deep, the size of your heap, and keep the soil to one side for later.
- Pit method: dig a pit about 1.2 metres wide, 60 cm deep and as long as your materials need. Keeping the width narrow lets you reach the middle when turning.
Lay a bottom layer of rough, chopped maize stalks, twigs or hedge cuttings about 30 cm thick and sprinkle it with water. This lets air in from below and lets extra water drain away.
Step 4: Build in layers like a sandwich
Now build up the heap in this order, and repeat until it reaches the full height (in the pit method, keep going until the material stands about 30 cm above ground level, because it will shrink as it decomposes):
- Browns: a 15 to 20 cm layer of dry material.
- Greens: a 10 to 15 cm layer of fresh green material and kitchen waste.
- Manure: a thin 5 cm layer of animal manure (or diluted urine if you have no manure).
- Starter: a sprinkling of topsoil, old compost and a little wood ash.
- Water: sprinkle each layer until it is damp but not dripping.
Step 5: Insert a testing stick
Push a long, straight stick or piece of bamboo diagonally into the centre of the heap. This is your thermometer. You will pull it out every few days to check what is happening inside.
Step 6: Cover the heap
Cover the heap with a layer of topsoil about 10 cm thick (use the soil you dug out in Step 3), then with dry grass, banana leaves or sacks. A cover keeps moisture and heat in, stops rain washing away nutrients, and keeps chickens from scratching it apart. In the pit method, a roof of grass or banana leaves stops the pit from filling with rainwater.
Step 7: Check the heat and moisture
Within 3 to 5 days, pull out the stick and hold it in your hand:
- Hot (uncomfortable to hold) and moist: the heap is working well.
- Cold, or coated with a white mould: decomposition has slowed or stopped. Turn the heap, and add water or more greens if needed.
- Wet and smelly: it is too wet and short of air; add browns and turn it.
- Dry and dusty: sprinkle water as you turn.
For the moisture, use the squeeze test: take a handful from inside the heap and squeeze it. It should feel like a wrung-out sponge, releasing only a drop or two of water.
If you have a compost thermometer, Cornell Waste Management Institute notes that decomposition is fastest between about 32°C and 60°C, and that above 60°C you should turn the heap to stop it killing off its own helpful microbes.
Step 8: Turn the heap
Turning mixes the layers, brings in fresh air and moves the cooler outside material into the hot centre. Each time, move the outside material to the inside, add water if it is dry, and do not add fresh materials. Three turnings are usually enough:
- Heap method: first turn after 2 to 3 weeks, then whenever the testing stick comes out cold.
- Pit method: first turn 10 to 15 days after filling, the second about 15 days later, and the third at around two months. At the last turning, lift everything out of the pit and put it back in, or shift it into a second pit next to the first.
Turning matters for safety too. According to the British Columbia Ministry of Agriculture, compost needs to stay at 55°C or more for at least three days to kill most pathogens, and every part of the heap must take its turn in the hot centre.
Step 9: Let it finish and cure
In our warm climate, a well-managed heap usually finishes in about two to three months. Faster “hot” methods can be ready in a few weeks with frequent turning, while a pit that is left alone may take six months or more. The FAO’s On-Farm Composting Methods compares both traditional and rapid approaches if you want to go deeper.
When the heap stops heating up after turning, let it sit for another few weeks to cure before you use it.
How to know your compost is ready

- It is dark brown to black and crumbly, like rich forest soil.
- It smells earthy and sweet, not sour, rotten or like ammonia.
- You cannot recognise most of the original materials (a few woody pieces are fine; sieve them out and put them back into your next heap).
- The heap stays cool even after you turn it and water it.
Be patient. Unfinished compost can still be “cooking” and may burn young roots or carry live weed seeds. The eOrganic research network explains that incomplete composting is the main reason weed seeds and plant pathogens survive.
Troubleshooting common compost problems
| Problem | Likely cause | Fix |
|---|---|---|
| Heap does not heat up | Too few greens, too dry, or too small | Add manure, fresh greens or diluted urine; water it; make it bigger |
| Rotten egg or sour smell | Too wet, packed tight, no air | Turn it and mix in dry browns; improve drainage or cover from rain |
| Strong ammonia smell | Too many greens (too much nitrogen) | Mix in dry leaves, straw or chopped stalks |
| Dry centre, nothing happening | Not enough water | Water as you turn until it passes the squeeze test |
| Rats, dogs or chickens digging | Food scraps exposed, meat or oily food added | Bury kitchen scraps in the centre; never add meat; cover the heap |
| Termites or ants in the heap | Heap too dry | Water and turn; termites leave moist, active heaps |
| Weeds sprouting from finished compost | Heap never got hot enough | Leave weeds with seeds out, or make sure the heap heats and is turned |
How to use your finished compost
- Preparing beds: Infonet-Biovision recommends about 20 tonnes per hectare for well-decomposed compost, which works out to roughly two large hoefuls per square metre, or a layer about 1 cm thick. Mix it into the topsoil before planting; hungry vegetable beds can take more. This is the first step in starting an organic garden from scratch.
- Planting holes: add a generous handful to each hole for tomatoes, peppers and other heavy feeders. See my ultimate guide to organic tomato gardening for spacing and feeding.
- Nursery and seedbeds: sieve the compost and mix it with topsoil (roughly one part compost to two or three parts soil). Full instructions are in preparation of nursery and seedling beds.
- Top-dressing: spread compost around growing crops such as onions and cover it with mulch so the sun does not dry it out.
- Compost tea: soak finished compost in water to make a liquid feed and natural disease suppressant. Try my compost tea recipes for early blight.
Compost works even better alongside other natural inputs. Compare your options in 8 best organic soil amendments and the best organic fertilizers for vegetables.
Beginner composting mistakes to avoid
- Building too small. A knee-high pile will not heat up. Collect enough to build at least one cubic metre.
- Using only one type of material. A heap of only grass turns slimy; a heap of only stalks never breaks down. Mix greens and browns.
- Forgetting water. In the dry season, a dry heap is the most common reason for failure.
- Never turning. Without air, a heap goes sour and slow.
- Using compost too early. Half-finished compost can harm young plants. Wait for it to cool and cure.
For more pitfalls beyond the compost heap, read 9 beginner organic gardening mistakes to avoid.
Frequently asked questions
How long does it take to make compost?
A well-built, regularly turned heap in a warm climate is usually ready in two to three months, plus a few weeks to cure. A pit or heap that is left alone without turning can take six months or longer.
Can I make compost without animal manure?
Yes. Replace manure with extra nitrogen-rich greens such as tithonia leaves, comfrey, fresh weeds and kitchen scraps, or sprinkle diluted urine over each layer. The heap may heat a little more slowly.
Should I cover my compost from the rain?
Yes. Heavy rain washes nutrients out of the heap and makes it waterlogged and sour. A cover of grass, banana leaves or sacks protects it while still letting air in.
Is compost the same as manure?
No. Fresh manure is a single raw ingredient that can burn plants and carry weed seeds and pathogens. Compost is a balanced, fully decomposed mix that has been heated, making it safer and richer in soil life.
How much compost should I add to my garden?
A good starting point is about two large hoefuls per square metre (roughly 20 tonnes per hectare) worked into the topsoil each planting season, plus a handful in each planting hole for heavy feeders like tomatoes.
Final thoughts
Making compost is one of the most valuable skills any farmer can learn. It turns waste into fertility, saves money, and builds the living soil that keeps crops strong against pests and diseases. It is also at the heart of why organic farming is regenerative: every heap you build gives back more to the land than it takes.
Start with one heap this season. Watch it, feel the heat on your testing stick, and in a few months you will hold the black gold that your garden has been waiting for.
Have you tried composting before? Tell me in the comments which method works best on your farm, and share this guide with a farmer who is still burning their crop residues.